A Dive into Flytec Computers' Expert Support
Published by Juan David on 24th Jan 2024
In the fast-paced world of technology, encountering glitches or hurdles with your devices is very common. What sets a brand apart is not just the quality of its products but also the unwavering support it offers when customers face technical dilemmas. At Flytec Computers, we believe in not just delivering innovative technology but also ensuring a seamless user experience through our expert support system.
A Day in the Life: Fixing Mikrotik Devices with Netinstall
Hey everyone! I am Juan and I am part of the technical support team here at Flytec Computers! Today, I dove into the world of Mikrotik devices. On my workbench were a few models: the RBwaPG-5HacD2HnD, CCR1072-1G-8S+, and RB760IGS. Each of them had its own quirks, but the common headache? They either wouldn't start up properly or got stuck in a never-ending boot loop. Annoying, right?
The solution? A handy little thing called Mikrotik Netinstall. If you are not familiar, it's a software tool provided by Mikrotik themselves. It's super useful for installing and reinstalling MikroTik devices that run on RouterOS.
Using Netinstall allowed us to give these devices a fresh start. After running the firmware upgrades, it was like magic – the units came back to life, functioning just like they were supposed to, without any hiccups. It's always satisfying to see tech behaving as it should, especially after a bit of troubleshooting.
That's all for today's tech adventure. Remember, sometimes all your gear needs is a little firmware TLC to get back on track!
How to perform a Mikrotik Netinstall
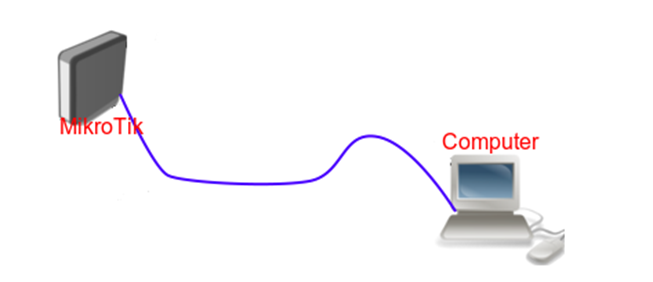
1.Download the Netinstall application and the corresponding RouterOS (ROS) file that matches your device. Also connect your device to the computer via an Ethernet cable.
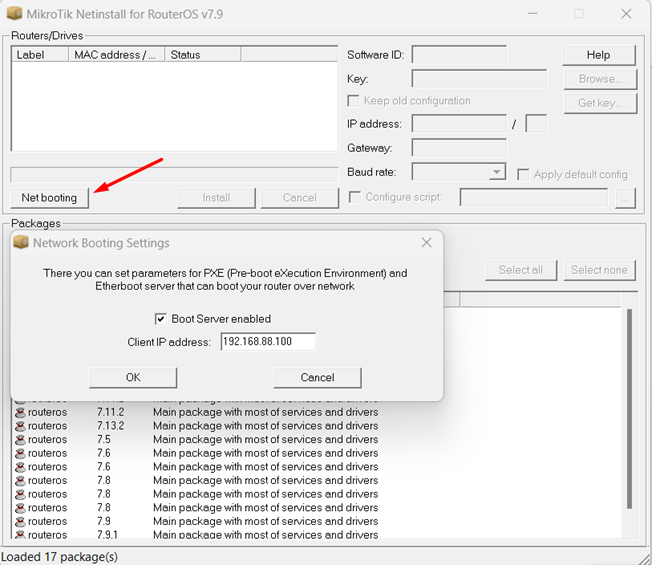
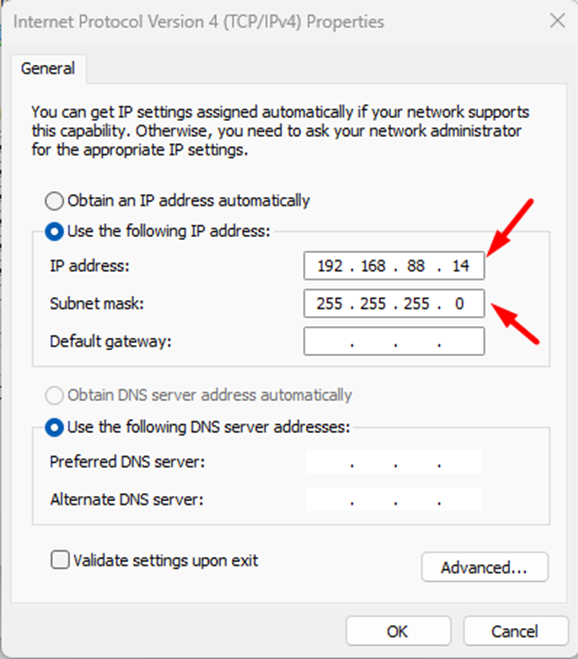
2.Adjust the “Net Booting” IP to align with your local IP range. (local IP address ex. 192.168.88.14 with subnet 255.255.255.0)
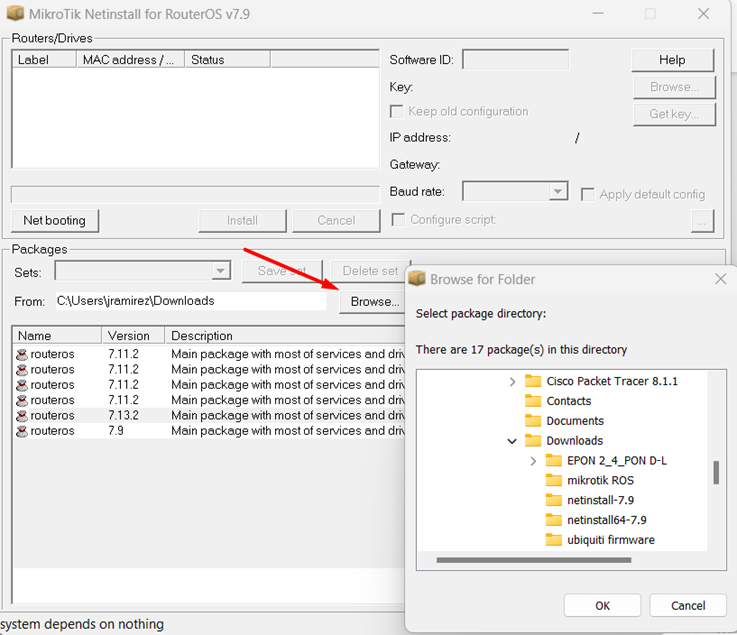
3.Select “browse” under the packages section.
4.Locate and select the directory where the ROS files are saved.
With these steps complete, you are ready to begin the Netinstall process.
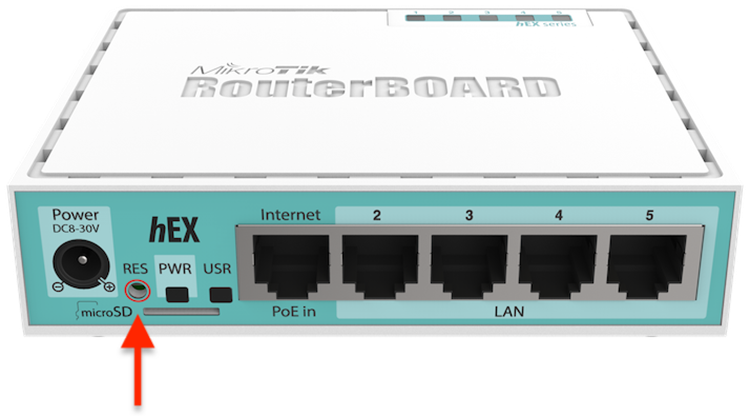
5.Press and hold the reset button on the device you're installing Netinstall on, and power it on while still pressing the button. The device can be powered either via PoE or a regular power source. Correct holding of the reset button is indicated by the "user" light on the device: it should stay lit for 5 seconds, blink for another 5 seconds, remain lit again for 5 seconds, and then turn off. Release the reset button after the light goes off. This action switches the unit to Ether boot mode, prepping it for Netinstall. The device should now be visible in the Netinstall "Routers/Drives" window.
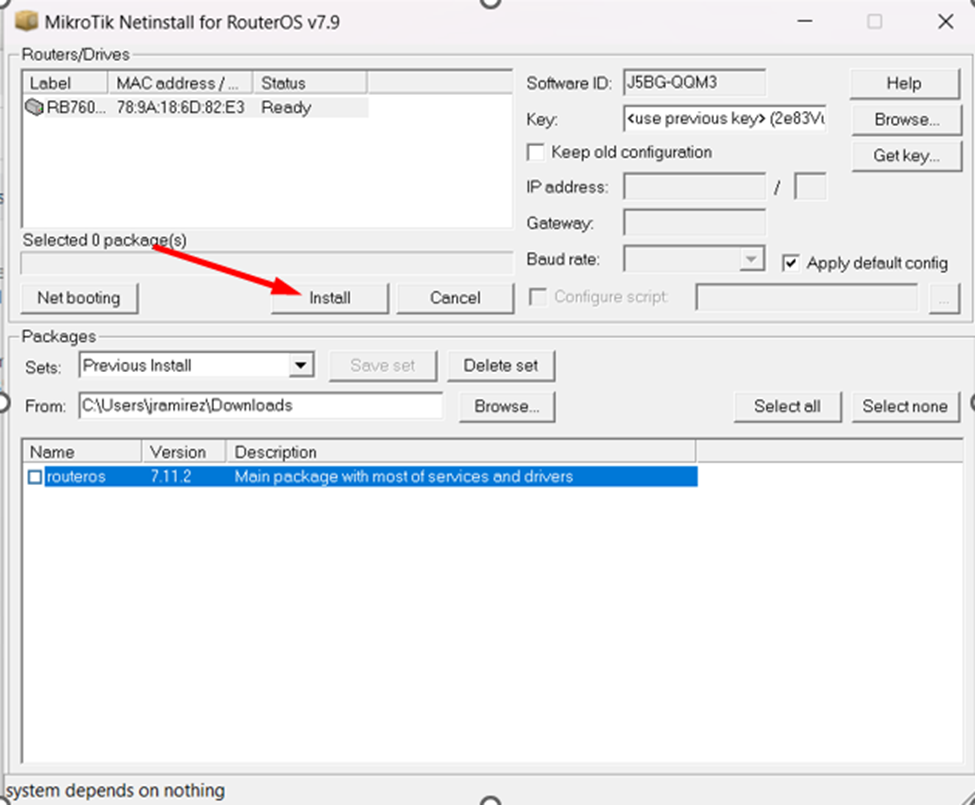
6.Choose the device and press “install”. The application will automatically choose the suitable ROS for the connected device.
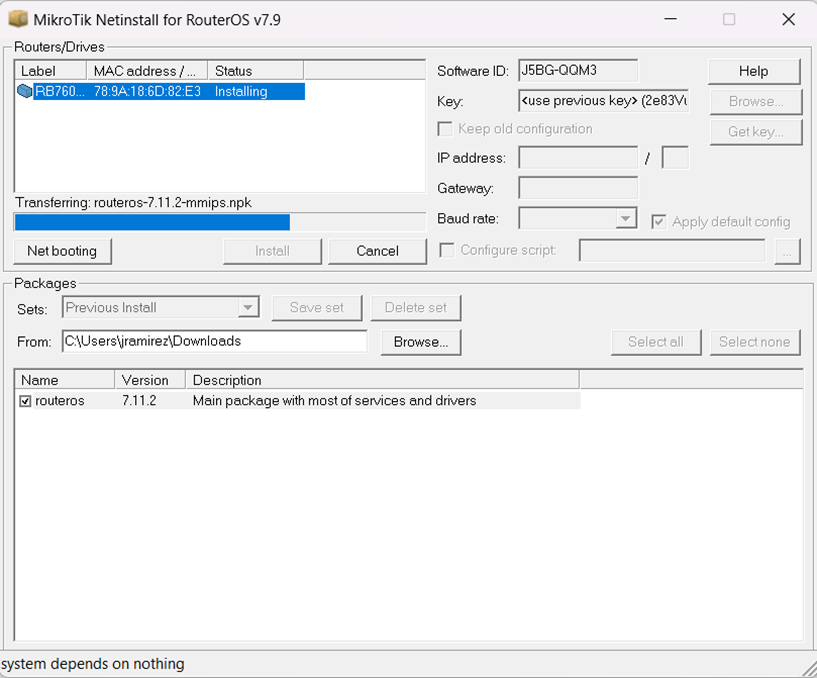
7.After the application formats and transfers the new ROS to the device, it will reboot and install the ROS, preparing it for subsequent configuration.
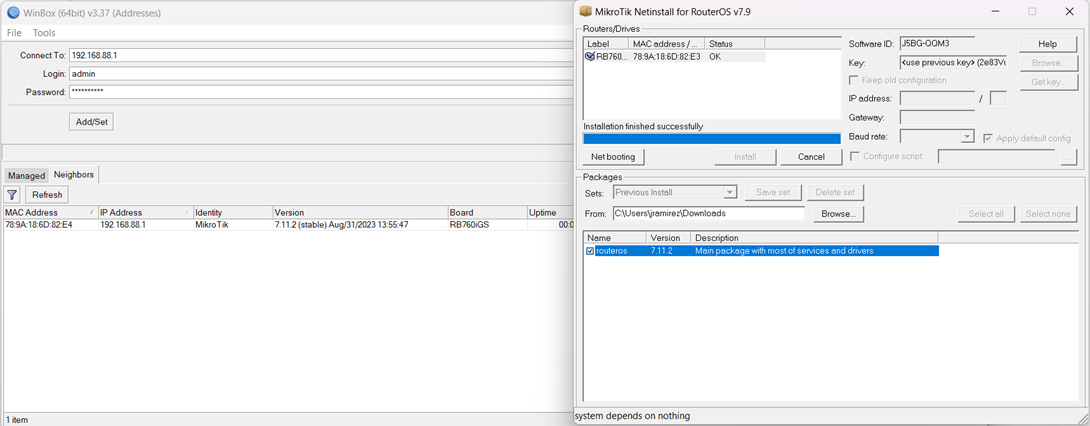
IMPORTANT: Keep in mind that performing Netinstall will completely erase the device, removing all existing configurations. It's advisable to back up the configuration before starting, if possible.

